Showing posts with label Janome 350e. Show all posts

Sunday, April 12, 2009

Owning More Than One Machine?

Does anyone else feel terribly guilty for owning more than one machine?  I'm going through a terrible bout of guilt.  I've never owned 4 machines in my entire life and I've been feeling sick over it.  I feel selfish and greedy.  I hadn't planned on owning more than one.  It just sorta happened that way.

My very first machine was a Singer that my mom had purchased for my birthday almost 8 years ago.  It was good for piecing but couldn't quilt to save it's life.  Hubby bought me a Janone Quilter's Edition 6260 and it worked for awhile until I read Harriet Hargrave's book on machine quilting.  Being so new to quilting, she made me feel like if I didn't own a very expensive machine with bells and whistles that I wasn't truly a quilter.

So I talked hubby into buying a used Bernina 1630.  I had never used a machine with 9mm feed dogs and couldn't get to Bernina classes as they were held during the day when my kids were in school and hubby was sleeping.  The classes were only held at certain times and there were no private lessons.  Not driving really sucks for classes.  Somehow I nicked the bobbin casing and was so frustrated I traded the machine up for an Aurora 440.  The problem was I couldn't afford the machine.  I fell for the "interest free" Bernina card.  The lady's eyes about popped out of her head when she realized I had the TOL limit on their card.  I realized later that if I didn't have the machine paid off within the time frame the interest would be charged from the beginning.  At 28% interest I was going to be financially impaired.  I sold the machine on Ebay.  NEVER buy a machine on store credit.  If you have to use a card, use your own.

Still listening to Harriet's advice, I kept wanting the "dream machine" she said I needed.  My LQS was having a local sewing machine store bring down Janomes and they talked me into buying the Janome 6600.  I wasn't that impressed with the machine but still very much a novice with machines I bought it anyway.  I've never truly liked the machine as I couldn't get it to accurately hold a 1/4 in seam allowance without the fabric sliding to the left.  No one I know was having this problem and the dealer said the machine was just fine.  I've put up with the 6600 for 3 years wanting to love it, but just couldn't. 

I bought the Janome 350e when I saw a beautiful embroidered quilt.  I bought the machine without even testing it and it's been a great machine.  I had no idea I would outgrow it so fast.

When a friend suggested the Viking line of machines, I fell in love with the Sapphire 870.  For the first time since starting to quilt, I found the machine of my dreams.  Then I realized that I needed a bigger embroidery machine and was able to purchase the Topaz.  Amazingly hubby said to keep the Sapphire as I was just going to trade up.  

That brings me to now with 4 machines and 3 of the are in storage as I don't have a place to put them upstairs.  However; each machine has its good points.  The Sapphire is perfect for piecing and has fabulous decorative stitches.  The Topaz does amazing embroidery designs.  I pulled out my 6600 today as it quilts with ease.  The 350e is perfect for embroidering small items.

I've bonded more with my 6600 for its quilting abilities today as I've been topstitching my quilt.   This truly is a fabulous machine now that I'm not mad at it for not piecing right.   

I feel SO much better after bringing this up.  Still feeling guilty, but knowing now that I have a bond with each of them at really helps.  They aren't wasting away, but used as needed.  
 

Wednesday, December 10, 2008

My Sister's Clutch Purse


I got my embroidery machine back yesterday and finished up stitching out the rest of the panels for a clutch purse.  The hard part is cutting away the fabric close enough to cover the edges with a satin stitch.  I have yet to master that skill and have bits of fabric between the satin stitching.  It's really frustrating.

I'm still figuring out iphoto as well.  It seems to publish to an online photo album but I can't find how to have the photos come here.  With Picassa you can just upload and put in an online photo right to Google.  
While the photo makes the color look red, it's actually a really pretty orange.  My sister LOVES orange.  I hope she likes it.

Ahh..figured it out!  You can download Picassa for Mac and it works with iphoto.  Cool!
Here's the inside of the bag:
 
From Blogger Pictures


Can you see where the satin stitching didn't work because I couldn't cut the fabric close enough?

Here's the clutch with the flap:
From Blogger Pictures


Here's where I could really use some help. I don't know how to keep the flap shut. Any ideas? The directions said to do it any way I wanted too. I thought of velcro, something in front, and that's it. I would love to do a strap of some kind, but don't know how to do that either.

I'll keep thinking about it.

Saturday, November 22, 2008

Scissors Are Cool


This turned out incredibly stunning!!! I bought applique scissors today as they were recommended for this type of work. It was so easy to trim the edges. I'm still shocked at how beautiful this turned out.

The water soluble stabilizer rinsed out pretty good but I will probably have to run it under again. I was thinking of giving this as a Christmas present, but I may have to keep this one too!

Now that I know how to put these FSL pieces together, this will be so much more fun.

Friday, November 21, 2008

Free Standing Lace Doily Done


I finally got it together after several hours of agonizing over how to stitch the pieces together. It looks fabulous and I love it. Well worth all the problems I've had with it over the past month. Each design takes around an hour to stitch out..and that's if your stabilizer works with you. I ruined a few of them.

I need a pair of applique scissors and hopefully hubby will take me to Lincoln tomorrow to get them. I've cut away the fabric as much as I dare with a regular pair of scissors.

My Sapphire 870 is AMAZING. It had no problem going through all the lace. I don't think my Janome 6600 would have done it as well using a small zigzag. I've tried using the 6600 before on a project that had thick seams and it choked up.

I love the Sewing Advisor. I had it set at medium fabric but it just didn't sound right. Plus the needle came out twice and I broke another. I set it to heavy and amazingly it worked!! No more problems. I still keep thinking the advisor is just a gimmick, but it's real. I love that the foot lifts up when you stop. It made going around the curves a breeze. No messing with a knee lift or the pressure foot lift.

I love that you don't have to hold on to the reverse button. Just press it and it goes backwards. I love the control I get with the foot pedal and the machine makes the most amazing looking stitches.

Did I tell you I LOVE this machine?? It's so nice having a machine you love. My Janome 350e is amazing as well. It sews out beautifully.

Monday, November 17, 2008

Christmas Cats


If I've been coming across as "weird" it's because the manic-depression symptoms are back. Medication helps but I do go through rough spots. Just know I'm rather cranky and irritable about stupid stuff and just let any annoying posts go over your head. If you think my posts are annoying, be grateful you don't have to live me. I'm grateful for a loving family who helps me get through the rough spots.

I have been doing some quilting stuff. I bought my first ever quilt magazine subscription from Mark Lipinski and got my first issue the other day. The issue is just what I needed to read.

I've been working out numbers for my pattern. How many strips you need to cut out..etc.

I did get this done today with my embroidery machine. My first attempt was..well...pathetic. But this one turned out really nice. I did it on a kitchen towel instead of a bath towel and it stitched out beautifully. I love the set and got both the 4x4 and 5x7 sizes. They are going to be a Christmas present but I'm tempted to keep the set to myself. LOL.

I still need to finish up a doily. I have 3 more pieces to embroider and then attempt to make it all fit together.

Thursday, October 23, 2008

Beep! ,,,Beep!...Beep!...

What a day. Hubby said the computer was making a beeping noise and I took a look at it. Every minute it was beeping. My first thought was my hard drive is dying. I went through everything trying to find out where it was coming from.

I called my dad and asked him. He said to restart the computer and see if it still beeped. If it still beeped put it in safe mode. It beeped in both. Sigh. My computer is cursed. I know it. Finally in frustration after a couple of hours I shut the dang thing off. Beep. Beep. Beep.

Great! I have a ghost of a computer now. Then it hit me. Something else is beeping not the computer. I look up and realize my TracFone is beeping to remind someone to charge it. I still have that stupid nonworking thing?? Sigh. I've spent all morning trying to figure out my computer and it's my TracFone.

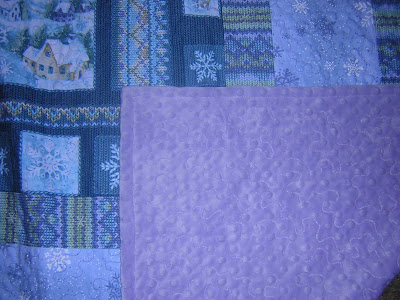
I have been working on things. I have my snowman panel quilt done for my hubby. Minkee fabric backing included as well. I even bound it folding over the minkee. Here it is:
From Blogger Pictures


And the Minkee backing:
From Blogger Pictures


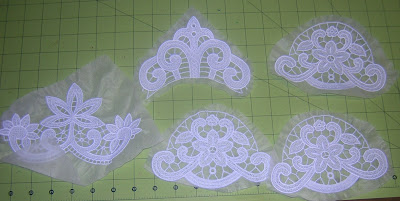
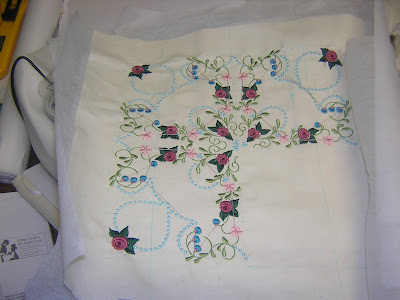
I've also done some lace on my Janome 350e.
From Blogger Pictures


My machine has eaten a couple of them. Nothing like 80 minutes gone down the drain. Sigh.

Thursday, September 25, 2008

I Got All 9 Done!


I finally have all 9 blocks done! WooHoo! I have them quilted but now I'm stuck. Do I make them into one big wall hanging or just bind each one and have a sleeve/tabs for hanging individually?

I was going to do the "quilt as you go" method but now I'm not sure I like the idea.

I tried to find the font that was used so I could add a title of sorts on the top. I'd probably have to email the website.

I did play with EQ6 some but since I can't put the designs in the squares, it's hard finding colors that work.

I guess I don't have to do it now. I can still think about it.

Tuesday, September 16, 2008

House Rules #3

From Blogger Pictures


I got this done today. I have 6 more to go. These are turning out so nice!

Monday, September 15, 2008

I Got Embird!

I bought Embird over the weekend for my embroidery needs. It's like EQ6. Janome's Customizer is overpriced (299) and under featured. However; if you want to use the Giga Hoop, you have to have it. Sewing machine manufacturers really know how to soak every penny out of us.

What I've really needed is a way to line up my design in the hoop so that I can do it 4 times. The Giga hoop is too small to put a 4.5 inch size design in. Customizer just prints out templates not placement. Customizer better utilizes the Giga hoop then Embird so Customizer isn't a waste.

Here's what I've done for doing my quilt block. I'm no expert by any means but it has worked for me. Embird lets you set your design anywhere and gives you X/Y coordinates. I set my design at -.50x1.5 inches so that it fits directly in the corner. The rest of the design is white so you can't see it. The next template I made I used brown.
From Blogger Pictures

I marked the center of the design and the center lines of the hoop. I also marked the edge of the design so I know where to place it on the fabric. That really helped with accuracy big time.

I cut out a 12x12 square of fabric and marked the center lines. I like even numbers..LOL.

1. Using the marked lines of the template I lined them up with the marked lines of the fabric. The marked line at the bottom of the design is used. NOT the hoop center line.

2. I marked the center of the design in all 4 squares. Next I marked the center lines of the template for use of the center marks of the hoop.

3. Using the center lines I hoop the fabric and then move the needle over to the center cross hairs and stitch out the design. I did this with all 4 sides of the fabric. It works! Here it is:

From Blogger Pictures

I made this picture larger so you can see the center of the design marks and then the hoop line marks. It's not completely perfect as I tried out the plastic template that came with my hoop. It's not lined right as I discovered. Just use the marks that come with hoop.

My next set of templates have the white design as dark:

From Blogger Pictures

I haven't darkened the lines yet.

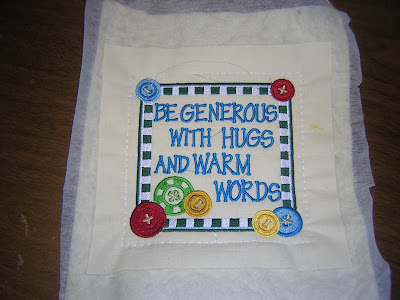
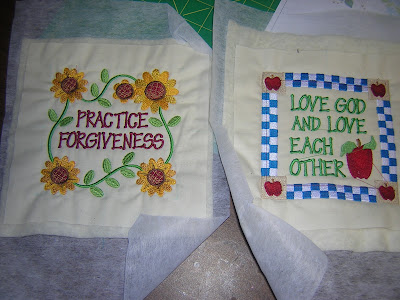
I have also been working on these:

From Blogger Pictures
They are part of a set of 9 blocks that have wonderful sayings about family. I plan to make them into a quilted wall hanging. I put batting underneath the fabric and will add the backing later.

Thursday, September 11, 2008

Resizing Designs

I got my jeans done with the embroidered flowers down the side. It looks great and I love them.

I told DH I wanted a serger. I did take a look at one at my Janome dealer but figured I'd wait and see how badly I really needed one. It would just be nice..not a necessity.

I'm still figuring out how to put 4 designs together to make a quilt block.

Here's what I have so far:
From Blogger Pictures

I've had to move the 5x7 hoop around the fabric and have been trying to have the designs meet up perfectly in the center. Umm..for a first try it looks pretty good.

Then my dealer said to resize the design for my Giga Hoop. The size of the block is 4.5 inches square. By the time I reduced the block it was really little. Here it is:
From Blogger Pictures

That's really resized and not what I wanted. I'm back to rehooping with the 5x7 hoop. My last attempt was pathetic with another block. I just need more practice.

Sunday, September 07, 2008

Embroidering On Jeans


I got this beautiful set of embroidery designs called "Simply Sublime" from "Reases Realist Designs" from the OregonPatchWorks site and did a pair of jeans with them.

I haven't taken off the water soluble stabilizer yet as I'm still figuring out to finish the jeans. I'm lost on that. I thought of these options:

1. Add extra flowers scattered randomly up the leg.
2. Go around the pockets..but I'd have to cut up part of the inside pocket seam.
3. From the top of the other leg go down with the flowers. However; that means ripping the seam all the way up.
4. Leave it as it is since I'm too tired to deal with it. LOL. I'm not used to having embroidered jeans for myself so I want to keep it adult like and not overload.

Here's a close up of the flowers:


My girls adore the patterns and want me to do their jeans as well. I love sticky back stabilizer as you just lay the jeans on top, add the water soluble stabilizer and go.

Monday, September 01, 2008

I Could Put My Car In This!!!

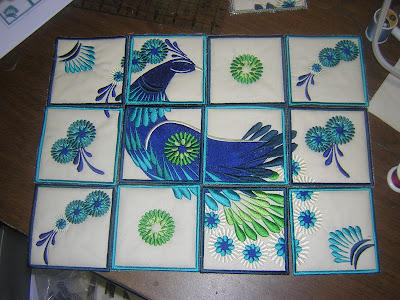
I got the peacock design done today! Those center parts took over a hour each to stitch out. Here it is:


Wow..I love it! I had no idea that this was a GIANT size tote bag..like I know what a tote bag is..LOL. I don't even carry a purse. That's what pockets are for. So the size right now is 12x16 inches. The directions have you add another 4 blocks making it a 16x16 size block. People have THAT much stuff?

Then you are to stitch out the blocks above for the back panel. Wait..it gets bigger! The smaller sides are 8 inches wide x 16 inches tall. Heck, I could my car in that. Or my sewing machine...Hey..that's an idea! Make it a cover for my 6600!

Dunno..make it a tote bag or a sewing machine cover?

Bag: If I did a purse thingy, I wouldn't add the extra 4 blocks on the top or the 8 inch sides. I'd keep the size I have and made the side pieces a width like 4 inches. I'd also use a dark color for the other sides. I figured I'd make the other sides quilted. It's constructing all the sides that will be the death of me. I have it planned out in my head but it's still an overkill sized purse/bag. Hmmm ...anyone want to make this into a bag for me?

Machine Cover: I have the cover to my 350e that I could use as a template. I'd have to do some adjusting but could get it to work. I'd have the best looking 6600 cover for miles. Then I could find a pattern for a smaller bag and get the "best of both worlds" according to Hannah Montana. LOL! I have little girls..can you tell? Hubby picked up the dvd for them.

Saturday, August 30, 2008

Using The Giga Hoop

I tried out the giga hoop today. The giga hoop lets you do larger areas without having to rehoop. It's basically 2 5x7 fields. You do one side, flip the hoop and do the other side. What it doesn't do is one large section starting from the middle. There isn't enough space to the right of the needle. The biggest catch to this hoop is being able to line up both sides perfectly. It means careful marking and careful editing.

Here's my first attempt:


Using Customizer I imported the design and opened the "Easy Gigahoop". I played with a couple of different layouts and decided on this one. I zoomed in to see if everything matched and got them as close as I could using the guides. I saved the design to my USB stick and stitched it out one side at a time. I'm off some..but in this case you wouldn't notice. My center marks are off just a tad and maybe the design as well. I'm pleased that it came out so good.

This is perfect for quilting! I can do large blocks this way. It took two hours to stitch this out though. I thought I'd picked a quicker design but for a test run, it worked.

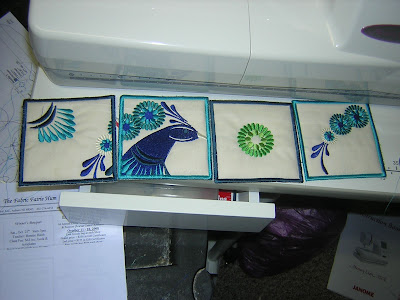
I've also been working on my purse squares. Here's what I have so far:

Somehow you are supposed to zig zag the blocks together to make this purse. Each block is quilted so it will be relatively stable. Still not sure this is going to work.

Actually; this is really easy as well, but tricky. The design stitches out the outline on water soluble stabilizer. You add the batting and the top over the stitching. The machine stitches another line over the two layers. The first couple of blocks have pleats as I was out of basting spray. The spray is a must so the layers don't shift. I thought I could away with it. After the design is stitched out, you add the backing behind the stabilizer. It does another outline stitch and then you trim the fabric as close to that outline as you can. You take the hoop off the machine, but you don't unhoop the project. That's still a skill I need practice on as it's really hard.

This pattern seems to be off on the edging as it doesn't quite line up with the basting stitches. I don't know how to fix it. When you trim the batting and fabric, it doesn't line up when you do the last satin stitching. I have the top row done and was working on the one of the 2nd row blocks when the inner hoop popped out while trimming the layers. 30 minutes down the drain..LOL.

Monday, August 25, 2008

Machine Embroidery And Quilting

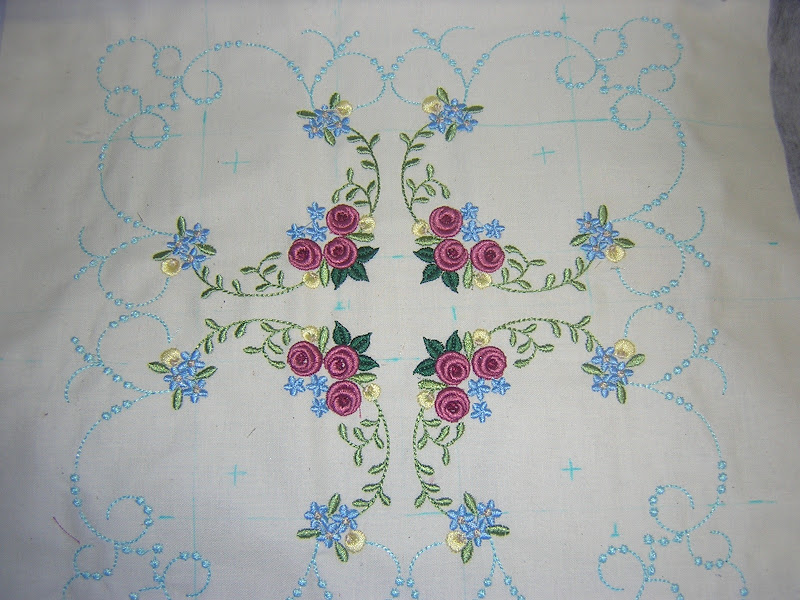
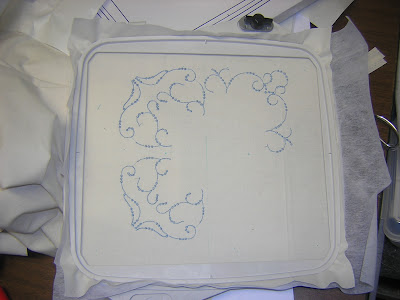
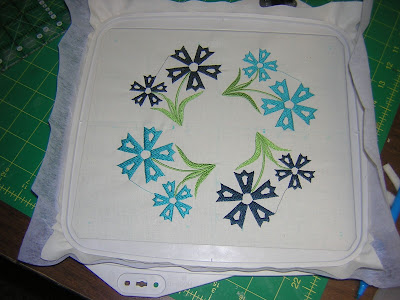
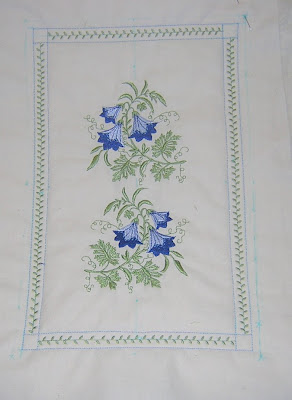
I played with the editing feature of my machine last night and came up with this:


I played with the rotation of the design and liked this one. It would be great for a border for a larger piece like a table cloth. I added the border with my Janome 6600. I had to take out part of the side design (try undoing all those tiny leaves) as I had a major pleat when the lines met. I hate when this happens. I used the border to quilt the design. It's still really hard to get the block square because of the quilting. It puckers the fabric and distorts it.

I'm not sure if I should finish it or attempt a "quilt as you go" using different designs. The dang quilt wouldn't be square when I got done though because of the distortion between all the blocks. The block is 8x12.

My thread for my peacock purse will be in Wednesday according to UPS. Stupid shipping cost half of what I paid for the thread and I went basic ground. Maybe I should spend the money to get software to convert to thread I buy locally. It would still have to be mailed out but I'd get it the next day and it wouldn't cost me more than a couple of dollars.

Saturday, August 09, 2008

Machine Embroidered Napkins

I picked up a set of napkins at Target the other day to practice some machine embroidery. I'll be honest. Our family doesn't have fine china, table linens and any else like that. It's not that I don't care, I'm just a simple person. And I can never find what I like anyway.

The hard part wasn't the embroidering. It was trying to figure out where to put the designs. My free trial of Embird has expired and since I don't know how to use it anyway, I'll wait for now. It seems like the software was for putting designs within a hoop, not for laying out an entire design. However; I couldn't print out templates to adjust around the napkins. Unless..someone else knows of another program to do that. Or of a book..or something to layout your designs.

So, I did it the hard way.

I drew diagonal lines and lines going in half. Ohh..the napkins aren't square either. Fun. Thankfully the design page had the dimensions of the pieces so I started with the corner. I got out my ruler and guesstimated where I wanted it to go. Then I drew lines to make the center of this square. Sigh. This gonna take forever. Since I was using a corner, I machine basted the fabric to the water soluable stabilizer, lined the hoop up with the center lines and put it under the machine. WOW! It stitched out beautifully.

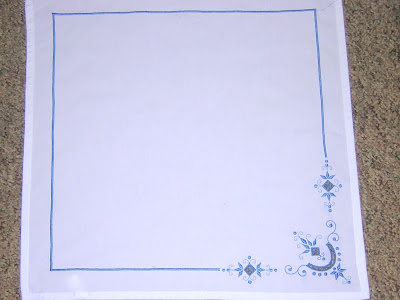
Now to get the other designs next to the corner. You want them straight and equally spaced apart right? After a half hour or so of playing and stitching out the design for a template I got what I wanted. Or so I hoped. After several hours of marking, stitching and satin stitching here is the finished piece:


Here's a close up of the corner:


I love the open cutwork designs. They are so beautiful and really easy to do. What I really wanted to do was add more of the side design around but don't know how to do it so it all matches up. I also think it needs more blue to balance the white. Or the corner design in the opposite side. Which I wasn't in the mood to do after trying to make this work for a couple of hours. It's not stitching out the design, it's knowing where to position all the designs. I know there's a KISS way to do this, I just don't know it.

BUT..if I can do this, anyone can. The information online is incredible and the downloadable designs are usually very good. My Janome 350e is a wonderful machine and I adore it. I did the satin stitch with the 6600 and it turned out beautifully as well.

Friday, July 11, 2008

Embroidering Shirts and Quilt Blocks

Been playing with my embroidery machine and got a design on a shirt. Once I figured it out, it was really easy. I just need help with the placement..LOL. I found a couple of sites that gave specifics on where to place designs on shirts, pants, towels..etc. Next time I will do a better job.

Here's a close up of the shirt:


Here's my daughter wearing the shirt:

I hadn't taken off the water soluble stabilizer yet. It turned out really good.

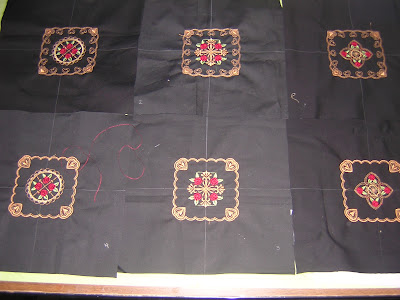
I've been working on quilt blocks as well. I have the first 6 of 30 designs done.

What I'm not sure is if I have messed up the black fabric. You can tell some of it is lighter even though it's the same. I did check the fabric and the front and back. Hmmm.

Monday, June 30, 2008

New Addition! I Did It!

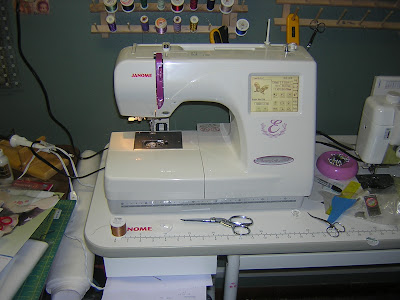
I did it! I got brave and did it! I now own an embroidery machine! I got a Janome 350e today. The dealer was SO wonderful to work with. He answered all my questions and was really honest with me. So...Here she/he is:


I know most people name their machines but haven't come up with one for this one yet. However; I haven't named it "Frustrating" LOL.

My biggest concern was that I am easily frustrated and worried about not liking the machine after I bought it. He was honest and said that I will get frustrated. It won't always work the way you want it to and I will screw up the designs. BUT..it was okay if I did. Sigh. Finally. Someone who doesn't say, "Oh..this machine is the best machine out there. You won't have any problems with it. Ever." Ummm..yeah.

He didn't try to sell me extra stuff. In fact he discouraged it until I was more proficient with the machine. He said to try the built in designs and learn from them. He explained stabilizers and the hoops. I just bought the machine, some stabilizers (not the rolls..just some packages), a starter set of thread (beautiful colors), needles, and a machine embroidery book. He threw in most of the stuff for free so that was nice. I paid half price for the book too.

He didn't have the software but said I got 10% discount with every class I took so I'd get the software and clothsetter then.

I brought my 6600 in and he got my bobbin winder to work much better.

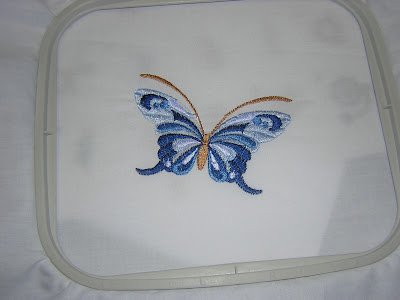
Okay...here it is..my first ever embroidery thingy:


The only problem I had was the thread kept falling off the spool when it was unwinding. It got caught under the spool and messed up the design. If you can't find it, even better. LOL. I don't know if I described the problem right to the dealer as he was lost. He said to bring the machine in as it shouldn't do that. I think it's just I probably don't have the thread in right. I just held the thread lightly as it went through the first guide so it had the right tension. Everything else went perfect. Wow..that's a first for me. I figured it would start eating fabric or making a huge mess.

My girls went nuts over the butterfly. They each wanted one on their shirts and some down their jeans. Sigh. I've created a monster now. They were loving all the built in designs and wanted me to make more. The butterfly took 20 minutes to stitch out. I'm tired.

The machine has automatic thread cutters which I LOVE. It's so easy to change threads that way. I love that I can hit the stop button if I notice there's a mistake or just need to stop it. It starts right up where it left off. You can even move the needle back some or forward if needed to work with the design.

It does have a USB port so I can transfer designs from the computer.

It has a touch screen as well. Really cool and easy to use. That's always nice. Even the manual was user friendly.