Showing posts with label water soluble stabilizer. Show all posts

Thursday, January 01, 2009

Quilting With Vilene

I spent to day trying to mark a quilt.   After weeks of thinking about how to quilt it, my brain finally kicked in. 

Normally I do pretty good at this.  I have several pens and a couple of pencils.  My water soluble pen which worked last week is not working today.  None of my pencils were dark and light enough to see the motif.  I finally got one done and then...

I'm using fusible batting.  Water soluble pen if pressed with an iron doesn't come out.  Good thing I only have one motif done.  Sigh.  At least I was smart enough to remember that.   

There has to be a simple way to mark a quilt.  And then it hit me!!  Vilene water soluble stablizer!!!  When you do machine embroidery, you put a WSS on top of something like a knit so the stitching doesn't disappear into the fabric.  Then you just wash it out.  Vilene looks like a mesh type fabric.

I traced out my design onto the stabilizer using my water soluble pen that protested and pinned it to the quilt top.  Check this out!!!
 
From Quilted with Love


And the back:
From Quilted with Love

My Sapphire 870 has no problem using invisible thread and has perfect tension when doing FMQ.  I love the floating foot that I bought.  

I could really use another WS pen though.  This one is dying big time.

Sunday, September 07, 2008

Embroidering On Jeans


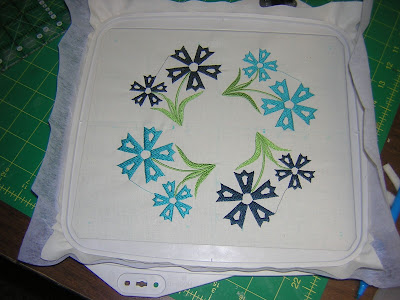
I got this beautiful set of embroidery designs called "Simply Sublime" from "Reases Realist Designs" from the OregonPatchWorks site and did a pair of jeans with them.

I haven't taken off the water soluble stabilizer yet as I'm still figuring out to finish the jeans. I'm lost on that. I thought of these options:

1. Add extra flowers scattered randomly up the leg.
2. Go around the pockets..but I'd have to cut up part of the inside pocket seam.
3. From the top of the other leg go down with the flowers. However; that means ripping the seam all the way up.
4. Leave it as it is since I'm too tired to deal with it. LOL. I'm not used to having embroidered jeans for myself so I want to keep it adult like and not overload.

Here's a close up of the flowers:


My girls adore the patterns and want me to do their jeans as well. I love sticky back stabilizer as you just lay the jeans on top, add the water soluble stabilizer and go.

Saturday, August 30, 2008

Using The Giga Hoop

I tried out the giga hoop today. The giga hoop lets you do larger areas without having to rehoop. It's basically 2 5x7 fields. You do one side, flip the hoop and do the other side. What it doesn't do is one large section starting from the middle. There isn't enough space to the right of the needle. The biggest catch to this hoop is being able to line up both sides perfectly. It means careful marking and careful editing.

Here's my first attempt:


Using Customizer I imported the design and opened the "Easy Gigahoop". I played with a couple of different layouts and decided on this one. I zoomed in to see if everything matched and got them as close as I could using the guides. I saved the design to my USB stick and stitched it out one side at a time. I'm off some..but in this case you wouldn't notice. My center marks are off just a tad and maybe the design as well. I'm pleased that it came out so good.

This is perfect for quilting! I can do large blocks this way. It took two hours to stitch this out though. I thought I'd picked a quicker design but for a test run, it worked.

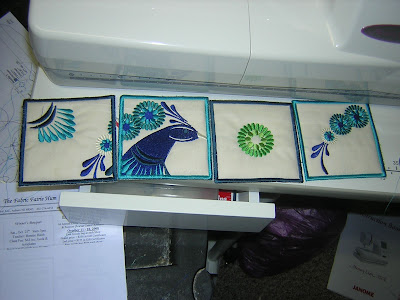
I've also been working on my purse squares. Here's what I have so far:

Somehow you are supposed to zig zag the blocks together to make this purse. Each block is quilted so it will be relatively stable. Still not sure this is going to work.

Actually; this is really easy as well, but tricky. The design stitches out the outline on water soluble stabilizer. You add the batting and the top over the stitching. The machine stitches another line over the two layers. The first couple of blocks have pleats as I was out of basting spray. The spray is a must so the layers don't shift. I thought I could away with it. After the design is stitched out, you add the backing behind the stabilizer. It does another outline stitch and then you trim the fabric as close to that outline as you can. You take the hoop off the machine, but you don't unhoop the project. That's still a skill I need practice on as it's really hard.

This pattern seems to be off on the edging as it doesn't quite line up with the basting stitches. I don't know how to fix it. When you trim the batting and fabric, it doesn't line up when you do the last satin stitching. I have the top row done and was working on the one of the 2nd row blocks when the inner hoop popped out while trimming the layers. 30 minutes down the drain..LOL.