Monday, December 24, 2007

Back Basting

I thought I'd share how to back baste for hand applique. It's actually really easy and a great way to baste.

First trace the pattern onto the paper side of freezer paper. This pattern is from the "Virtues" quilt that I am working on.


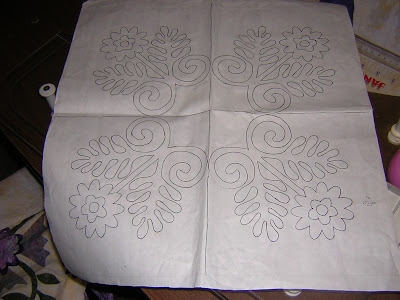
I traced it first in pencil and then went over it in black marker. I also drew in the center lines for easy placement with the fabric. On the back of your block lightly mark the center lines as well.

Put the freezer paper on your ironing board paper side down. Next, using the center lines place the FRONT of your block onto the freezer paper. The back of your block is up facing you. Press the fabric to the freezer paper. Because you used black marker, you can easily trace the design in pencil to the back. No light boxes or tape. One easy step.

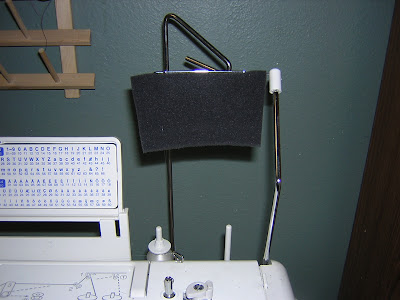
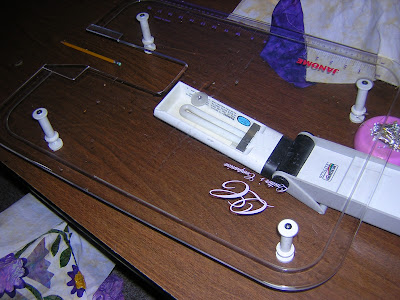
You will need a light box of sorts now. I take my acrylic table that I got with a previous machine and add my OTT light. You can use any light that will fit underneath. Works great.


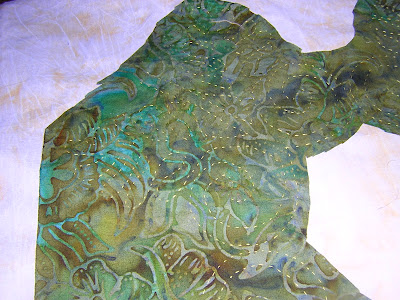
Take the fabric you are going to use and place it on top of the light box. Take the fabric block and place the block on top of the fabric. Using the light box, you can see the design that needs to be basted. I don't know if you can see the pencil marks, but this is the back of my block. Green fabric for the leaves are under it.


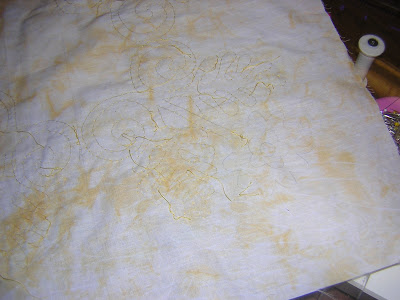
Got thread you absolutely hate?? This is your chance to use it. Baste around the pencil lines with that thread. Make sure it's visible enough for the fabric you are using. In my case I've used this terribly ugly yellow thread. It's hard to see where I basted because the back is yellow.

After you have basted around the pencil marks, turn it over and now your piece is basted ready for turning under. Take your scissors and carefully trim the fabric around the yellow basting stitching. As you applique, take out the basting stitches. Where the stitches were made, you can follow them as a guide. It's so simple and easy. It's my favorite method of applique.

Monday, December 10, 2007

Janome 6600 table and Paint Sponges


I got an email from a lady looking for this table as she couldn't find it. I checked on Ebay for Kens Sewing Center and couldn't find it. Wow. So I did a Google search for Ken's website and called him up asking about this table. He said Janome no longer allows him to ship out-of-state and had to shut down his Ebay store because of it. Geesh. Talk about getting ruthless Janome. When I asked how come he has these tables and my Janome dealer has NO clue what I am talking about he said that most dealers don't carry acessories. They just want to sell machines. He said he sold hundreds of them all the time as the demand was so high.

I emailed Janome and let them have it (politely of course) about my frustrations of my dealer not knowing about this table and that their new rule was unfair to us as the consumer. They won't care of course, but at least I feel better.

SO since Janome is being stupid, if your dealer has no clue what you are talking about give them this part number: 494702002 for the Janome Sewing Cabinet. It took me forever to find it on the Janome website.

Hopefully that clears up some things for people who want this Janome table.

Next problem LOL.
I've been using invisible thread for a week now without any problems until today. Sigh. Of course I need to get this project done ASAP so I can mail it out when problems hit. I had just changed needles and was quilting along nicely when there was this loud CLUNK and my needle broke. Of course it's my last size 60 needle. I rethreaded the machine and put in a new size 70 needle and proceeded to sew. CLUNK and the needle breaks. Today really isn't my day. I check the thread path again and realized that the thread was getting caught up in the thread stand thingy. The invisible thread is twisting around the thread holder. I try my big thread holder and as I watching it, it got twisted up again.

I really can't can't win today. The invisible thread is all twisty like from being on the spool and I really needed better tension. Then it hit me. My mom has a thread stand that she got from her Viking dealer years ago. It has a foam thingy that you put your thread through and creates wonderful tension. Of course when I checked the Viking store a couple of years ago when I was visiting my mom they said the stopped carrying those about 10 years ago.

I had hubby drive me to my local Pamida and got a few of those cheap wide foam brushes in the paint department. They are just like the sponge thingy on my mom's thread holder. I carefully took out the handle and realized it was just perfect to fit over the the two thread paths over my Janome 6600.


IT WORKED. I took a needle and pushed the invisible thread through the foam and followed the thread path. No problems whatsoever. Whoo Hooo! Yeah, I know about the safety pin trick but the thread was twisting up by the bend in the holder.

My day is going so much better now. I just need to put a sleeve on the back of the quilt and keep working on hubby's quilt. I don't know if the foam works for thicker threads (my mom's stand does) but for invisible threads, it's perfect.

It's nice to know I'm not nearly as dumb as I think I am.


494702002