Saturday, August 30, 2008

Using The Giga Hoop

I tried out the giga hoop today. The giga hoop lets you do larger areas without having to rehoop. It's basically 2 5x7 fields. You do one side, flip the hoop and do the other side. What it doesn't do is one large section starting from the middle. There isn't enough space to the right of the needle. The biggest catch to this hoop is being able to line up both sides perfectly. It means careful marking and careful editing.

Here's my first attempt:


Using Customizer I imported the design and opened the "Easy Gigahoop". I played with a couple of different layouts and decided on this one. I zoomed in to see if everything matched and got them as close as I could using the guides. I saved the design to my USB stick and stitched it out one side at a time. I'm off some..but in this case you wouldn't notice. My center marks are off just a tad and maybe the design as well. I'm pleased that it came out so good.

This is perfect for quilting! I can do large blocks this way. It took two hours to stitch this out though. I thought I'd picked a quicker design but for a test run, it worked.

I've also been working on my purse squares. Here's what I have so far:

Somehow you are supposed to zig zag the blocks together to make this purse. Each block is quilted so it will be relatively stable. Still not sure this is going to work.

Actually; this is really easy as well, but tricky. The design stitches out the outline on water soluble stabilizer. You add the batting and the top over the stitching. The machine stitches another line over the two layers. The first couple of blocks have pleats as I was out of basting spray. The spray is a must so the layers don't shift. I thought I could away with it. After the design is stitched out, you add the backing behind the stabilizer. It does another outline stitch and then you trim the fabric as close to that outline as you can. You take the hoop off the machine, but you don't unhoop the project. That's still a skill I need practice on as it's really hard.

This pattern seems to be off on the edging as it doesn't quite line up with the basting stitches. I don't know how to fix it. When you trim the batting and fabric, it doesn't line up when you do the last satin stitching. I have the top row done and was working on the one of the 2nd row blocks when the inner hoop popped out while trimming the layers. 30 minutes down the drain..LOL.

Monday, August 25, 2008

Machine Embroidery And Quilting

I played with the editing feature of my machine last night and came up with this:


I played with the rotation of the design and liked this one. It would be great for a border for a larger piece like a table cloth. I added the border with my Janome 6600. I had to take out part of the side design (try undoing all those tiny leaves) as I had a major pleat when the lines met. I hate when this happens. I used the border to quilt the design. It's still really hard to get the block square because of the quilting. It puckers the fabric and distorts it.

I'm not sure if I should finish it or attempt a "quilt as you go" using different designs. The dang quilt wouldn't be square when I got done though because of the distortion between all the blocks. The block is 8x12.

My thread for my peacock purse will be in Wednesday according to UPS. Stupid shipping cost half of what I paid for the thread and I went basic ground. Maybe I should spend the money to get software to convert to thread I buy locally. It would still have to be mailed out but I'd get it the next day and it wouldn't cost me more than a couple of dollars.

Thursday, August 21, 2008

Machine Embroidery Tips

I ordered my threads today for the peacock bag. I'm slowly understanding the machine embroidery world of designs. Here's what I've figured out:

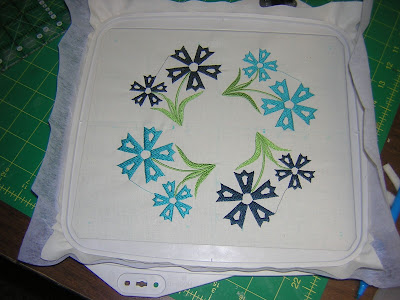
1. Check Your Sizes. I almost ordered a 9 inch design by accident. My largest hoop is a 5x7. Also check if your design is too small..or has enough designs that are in scale to one another. I ordered a set thinking they were different sizes and they weren't. There are no exchanges or refunds in this world.

2. Check Your Format. Janome runs on JEF. Before ordering make sure you buy the right format. Now, if you screw up and have a spiffy software program you can convert designs, but I don't. I've found that a lot of "freebies" only come in certain formats.

3. Know What You Want. People are out to get you to buy their stuff. They offer freebies, discounts, special pricing for joining their groups/newsletters, and funky sales ideas. It's almost like watching "QVC" all day long. LOL. It's really easy to fall into the trap of buying things not because you want them, but because they hype it up. Hmm..don't they do that with fabric too? LOL

4. Back Up Your Designs. If your computer crashes, you are out of luck. I copy mine to CD and label the discs. I have some on a USB drive as well. Actually; someone on the Janome group had a great idea of backing up all your personal stuff on a USB drive in case of emergency and you have to leave your house ASAP.

5. Don't Be Afraid To Try New Things. I fell in love with the peacock design on the purse but had to decide if I wanted to try the purse. I took the risk because the design was on sale and I liked the design of the purse. The site had 2 other peacock designs on sale as well, but I knew they weren't for me. There are TONS of purse patterns out there, but I liked this one.

6. Check The Quality Of The Design. It might be a stunning design, but if it seems "off" it might be. 99% of the designers I've used are incredible and I haven't had a problem. I have been to other sites that have been plain awful.

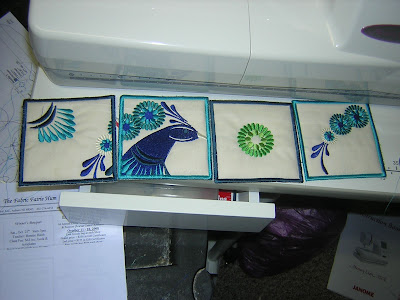
I love sites that show examples of their work and work from other people. As a newbie, it boosts my confidence and gives me ideas of what to do with a design. I'm not so much interested in freebies as I am with workable projects. The peacock purse had directions, thread lists, and actual pictures of the purse. While the designer figured I knew what I was doing when she wrote the tutorials, having pictures is wonderful.

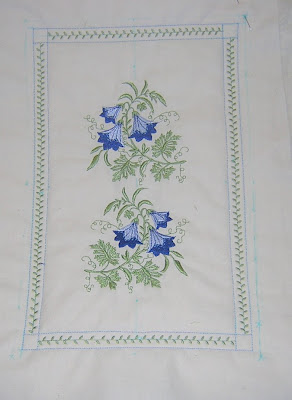
7. Print Out Templates. I have a 3 ring binder full of print outs of the designs in their sizes. It helps me plan out a pattern and I have instant access to designs. Yes, it takes time and space but it really helps.

8. Organize. I'm still working on this one. I know they have software out there for organizing down to the tiniest detail but at this point, I can't afford them nor do I need it. However; if you stick everything under your embroidery file, it's easy to lose things. I do have subfiles and that helps some. This is where the physical template binder helps. I can be more anal there.

I find that organizing by designer helps more than organizing by subject. Then within the designer you can put in flowers, quilt blocks, etc

9. Join The Groups/Newsletters That You will Buy From. With everyone wanting your attention it's easy to join everything. I've had to scale down to the sites that I do want instead of everything. There's no point having someone that you don't want, emailing you every day to buy their stuff. Joining up with some groups has let me find sites that I would never find on my own.

10. Buying From Different Sites. I've found that designers are on several sites that are like being in a shopping mall. Each "mall" has different payment types and offer different types of "rewards" and clubs. Some "malls" I don't like so I don't use them. Designers have their own site but belong to "malls". I watch the specials from each "mall" and buy that way to get the best deal for me.

Saturday, August 09, 2008

Machine Embroidered Napkins

I picked up a set of napkins at Target the other day to practice some machine embroidery. I'll be honest. Our family doesn't have fine china, table linens and any else like that. It's not that I don't care, I'm just a simple person. And I can never find what I like anyway.

The hard part wasn't the embroidering. It was trying to figure out where to put the designs. My free trial of Embird has expired and since I don't know how to use it anyway, I'll wait for now. It seems like the software was for putting designs within a hoop, not for laying out an entire design. However; I couldn't print out templates to adjust around the napkins. Unless..someone else knows of another program to do that. Or of a book..or something to layout your designs.

So, I did it the hard way.

I drew diagonal lines and lines going in half. Ohh..the napkins aren't square either. Fun. Thankfully the design page had the dimensions of the pieces so I started with the corner. I got out my ruler and guesstimated where I wanted it to go. Then I drew lines to make the center of this square. Sigh. This gonna take forever. Since I was using a corner, I machine basted the fabric to the water soluable stabilizer, lined the hoop up with the center lines and put it under the machine. WOW! It stitched out beautifully.

Now to get the other designs next to the corner. You want them straight and equally spaced apart right? After a half hour or so of playing and stitching out the design for a template I got what I wanted. Or so I hoped. After several hours of marking, stitching and satin stitching here is the finished piece:


Here's a close up of the corner:


I love the open cutwork designs. They are so beautiful and really easy to do. What I really wanted to do was add more of the side design around but don't know how to do it so it all matches up. I also think it needs more blue to balance the white. Or the corner design in the opposite side. Which I wasn't in the mood to do after trying to make this work for a couple of hours. It's not stitching out the design, it's knowing where to position all the designs. I know there's a KISS way to do this, I just don't know it.

BUT..if I can do this, anyone can. The information online is incredible and the downloadable designs are usually very good. My Janome 350e is a wonderful machine and I adore it. I did the satin stitch with the 6600 and it turned out beautifully as well.

Sunday, August 03, 2008

Minky Fabric And My Husband

If you ever happen to stop in Urie, Uinta County, Wyoming, just off of I-80 you HAVE to stop off and visit "Valley Fabric Shop". The store was fabulous! She had display quilts of everything. We had stopped off in Urie on our way back from Utah because my grandmother was born and raised there. I hadn't expected to find a quilt shop so it was quite a treat.

I dragged DH and the kids around and suddenly hubby points at a display quilt and says, "I want that one". I took a look at it and laughed. Wanna know what he picked out?

I'm not kidding. He wanted a snowman quilt. It's a snowman panel and strips of the coordinating fabric. On the back of the display quilt was purple Minky fabric. Hubby falls in love after he strokes it and wants it as a backing as well. Now..I know Minky is EXPENSIVE and I figured he'd give up after he saw the price. Nope. He didn't choke at the price at all. My jaw dropped as he ordered 2 yards of purple Minky fabric since she was out. I should get it next week some time. I'm in shock now. Pale purple Minky fabric and a snowman quilt kit??!! Wait. It gets better.


Hubby picked out the fabric for the above quilt. I'm NOT kidding. There was a display of this quilt in these colors but she didn't have a kit. He decided he wanted that quilt and I started pulling out greens, browns and creams. He would say whether or not he wanted the fabric. You know..he's picky. He was finally happy with the above selection with a moose fabric border. It's done in flannels and he liked that it was a "manly" quilt.

I've decided he's going to help make those quilts. Even if it's just cutting strips with a rotary cutter. You know, our husbands know more about quilting than they'll ever admit too. It's wonderful that my husband takes such an active role in quilting. He never used to care, but to see him running around a quilt shop picking out fabrics for the above quilt was so incredibly sexy.