Showing posts with label fusible applique. Show all posts

Sunday, March 18, 2018

Quilting "My Tweets" by Erin Russek

I fell in love with"My Tweets" an applique quilt by Erin Russek years ago and was determined to finish it. I thought this would be an easy project.  I was wrong.  In fact, I stuffed the quilt in a drawer and forgot about it.  I hated it.  I wanted to burn it but I'd put too much work into it.

I didn't hate the pattern,  Erin makes fabulous quilt projects so check out what she does.  I just was overwhelmed all those pieces, reverse tracing, fusible webbing, multiple fabrics and then all the satin stitching.  I didn't square the blocks correctly and everything was a mess.  I had to redo the entire center because I messed up the background size.  I got to the border and that's when it was stuffed into a drawer.

The pattern was designed by Erin Russek around 2011 and it's now 2018 so that explains how long it's been stuffed in a drawer.  It took a couple of years or so to get this far.  Then my dad's wife came to visit and found the quilt.  Her and my dad fell in love and asked if I would finish it for her.  I agreed to finish it for her and my dad out of love.

Here's the top w/o the light green border fabric.

My mom was super awesome and helped me get it all pinned and ready to quilt.  Now to choose how to quilt it.  I haven't quilted in years.  This quilt pretty much ruined it for me.  I started making mini albums and gave up quilting.  I haven't even posted anything for years.

I wondered how other people had done their "My Tweets" quilts but only found two finished quilts.  Both were beautifully quilted but beyond my quilting skills.  I wonder how many others finished this pattern since I could only find two.

My first thought was to use the flowers in the four centers until after I quilted the bottom and realized they were out of proportion and didn't fit around the centers as they were different widths.  It's pretty, but I didn't like it.  I spent yesterday ripping it out.
  I wanted the corners to be like the top of the flower.  I put them in the corner and realized it looked like Art Deco.  Cool.  I then put a one inch strip around the borders to frame the quilt.  It was out of proportion and I didn't like it.

So I cut out two small 1/2 inch strips and laid them out like this.  Much better.  Now the center needed something else.  I did a Google search on art deco but didn't find anything.  I then had the idea to put a square on point in the center and sent a picture.  My dad and Heather loved it.  I still think it needs something else, but will figure it out later.  Now to figure out how to mark it.
Turns out tools for marking quilts hasn't changed.  The usual blue pen (I don't dare because if I wash the quilt, it will probably turn blue), the purple pen and the chalk liners.  Then someone brought up the Frixion pen by Pilot.  Oh my gosh, the ink disappeared when I ironed it!  Pilot was a genius.

Awesome, except the lines come back if you put it in the cold and my background is white.  I emailed the company and asked if they would make a pen like this for fabric.  They said they'd look into it.  This pen does have it's uses, but not on white fabric going to a loved one.  Like others have said, use with caution and test your fabric as Pilot never designed it for fabric.

I think my choice is the purple pen.

Then while at the quilt shop I discovered this:
 Not sure how long this product has been around, but I LOVE it.  The pins are so much easier to use and it's worth the 20 dollars I paid for it.


Thursday, March 19, 2015

Steam-A-Seam Lite? Love It Or Hate It? *Edited*

I went to my LQS to get some fusible webbing for the "My Tweets" quilt I started several years ago and came home with Steam-A-Seam Lite.  I rolled it out expecting paper to draw on and got wax paper instead.  Huh?  You can't draw on wax paper.  On the other side where the fusible webbing is, there are paper instructions.  You have to pull off this paper and draw on the fusible.  I should have taken it back right then but my son took off with the car.


Pulling off the paper side lifts your fusible webbing. You cannot use a pencil with this fusible.  You cannot use a regular pen with this fusible.  I had to use a  Sharpie pen.  What do you do if you are using white or light colored fabric?  Since you are going over webbing, my accuracy was off and if I drew into the space, I had to start over.  Trying to do small pieces would be a nightmare.

Once you've traced the pattern onto the fusible, you turn it over and put it on the fabric and press it.  I get the wax paper usage now.  However; I now have marker lines on my fabric when I cut off the paper.  It's a good thing I'm satin stitching or I'd be really upset.

The upside to this fusible webbing is that it works.  I pressed the pieces down onto my block and didn't have issues.  It is light and pliable and it made satin stitching so much easier.

Would I buy it again?  Probably not.  I don't want to trace using a marker and if it bleeds into the fabric,  it's ruined.

Anyone else used this product?  Any tips that would make me use it again?  I have 3 yards left and I have no desire to trace several hundred leaves with a marker and then hope it doesn't mess with light green fabric.

*Duh*.  Call the company and ask about how to use the product.  The lady was really sweet and explained that I had an older version that didn't sell well because of the tracing problem and they had come out with a new version.

I'll keep it for now since I hate tossing stuff and might find a use for it later.

Tuesday, March 17, 2015

"Fiesta de Talavera" Now I Remember Why I Never Started

While cleaning out my quilt closet I found this pattern that I loved when I saw it.  I even bought some fabric for it but when I checked the instructions I realized I'd never come close to finishing.  Block one alone has 101 separate pieces to appliqué.  That's a LOT of work just to trace, fuse and sew down.  Maybe I should sell the pattern to someone more advanced and determined than I'll ever be.  Any takers?    


Sunday, January 30, 2011

"Fiesta" Block One

I think I hate fusible webbing.  I have marks appearing from the webbing coming through to the front.  The "lite" stuff doesn't stick and the regular ones leave marks.  I hate positioning the stupid pieces hoping they don't shift while pressing as I messed some of that up as well.  Arggh.  I hate fusibles.

Here's the block.  I love the colors.  The inside flower is from Hoffman's 1895 Bakiks in Blue Jay.  I only had a fat quarter from the bundle I bought so I ordered 2 yards online.  The other blue is something I found in my stash.  Tuesday I'll have to go to the store and see if there is more or find out what the color is to order yardage.  If she doesn't, I wish she could just order me two yards instead of looking for it online.  I'd rather her get my money.  


Monday, June 08, 2009

Look Out! One UFO Done!!

Muwahhahahah!  I have one UFO done and I love it.  My appliqued flower could probably be placed a little higher but it's beautiful.  And.. for once there were no swear words used in the making of this project.  That's because I simplified it.  No snaps.  No magnets.  No buttons.  I even got the purse strap between the outside and the lining!!  

The first purse like this was a disaster.  It took several days and so much frustration I wanted to cry.  It wasn't the pattern, it was just not knowing how to make a purse nor how to put the extras in.  I gave that purse to my daughter and she adores it.  I got this one done in an afternoon.

Wanna see it?

From Blogger Pictures
A close-up of the flower:

From Blogger Pictures


I did the flower using 606 spray. Errr. It works but I'm not sure it's worth the time and it's rather messy.  Maybe because it took several tries to get it right.  I can still see the edges fraying just like with fusible webbing.   

I drew out the flower free hand on paper.  Then realized I needed to reverse the pattern and retraced on the back.  I sprayed the fabric with 606. It leaves a white film and make sure it's really white.  I used 505 spray to adhere the fabric to the paper and cut out around the flower section.  I cut out each flower piece and took off the paper template.  I positioned the pieces onto the purse and pressed it with the iron.  I don't think my pieces were "white" enough but I can't redo it.  I couldn't find my brown to satin stitch it either.

I'm trying to decide if I should add a smaller flower or some leaves but figure simpler is better.

I'd love to make a matching wallet but don't have a pattern and I'm too cheap to pay for one.  
    

Sunday, May 10, 2009

Outlining My Horse

I've managed to get a lot of the horse done.  I gave up on free motion quilting because it looked so bad.  Even while going very slow, I couldn't keep the stitches even like I wanted.  This project just screamed perfect stitches for outlining.  

Here's a close-up of the outline work:

From Quilted with Love


From Quilted with Love


This is turning out really beautiful. I can't wait to get it done. I love that the pressure foot lifts every time you stop for more detailed sewing. Once I discovered I had a clear open toe foot with a cover in front of the needle, it's been perfect for this. The fabric isn't sliding over the edge. I haven't needed a walking foot for this either. And..no take-up lever issues. I love this machine.

Friday, April 24, 2009

"Spring Storm" Horse Applique Kit


From Quilted with Love
I got brave today and pulled out my "Spring Storm" horse applique kit.  I've been dying to do it, I just wasn't sure how to do all the pieces.  Plus I worried about running out of fabric and tracing all the pieces. The fusible webbing I have is really thin and comes apart from the paper just by moving it.  It's all my LQS has as the ladies love it.  I like the heavier stuff but that requires a trip to Lincoln or Omaha. 

It was SO easy!  Big Fork Bay Cotton Company had several pages that fit perfectly under the fusible applique.  They were already reversed (THANK YOU) and you just traced and labeled the pieces.  They had labeled the fabric as well.  They also provided a full size picture of the horse. THANK YOU!

I had some projector sheets, taped 4 together and traced the horse template to position the top pieces.   I taped down the background fabric (I'll do the borders after the horse is done) and taped the top of the sheets over it.

From Embroidery Designs
What I didn't think of earlier was to put the pieces in bags from 1-9, 10-19, 20-29 up to 100 until several hours later..LOL.  Duh.  At least I did think of it.  

Here's the horse with the clear template over it:      

From Embroidery Designs
I'm up to the 50's now.  Halfway there!   I used my small Clover iron to press the pieces in place.  I've been doing this since 2pm and it's now after midnight.  My house is a wreck.  My kids had to fend for themselves for food..  Yep.  I'm a quilter.   

Saturday, October 25, 2008

Pattern Inconsistencies

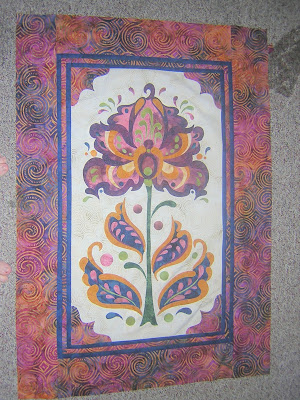
I got the top done for my "Floral Meditation". Well..sort of. I don't think I cut down the panel right and it's off by a LOT. That's what I get for not cutting the panel first and adding the flower after it. So much for square.

Another part of the problem with the pattern is that the paper template is off on the border information. It's not 17.5 x 30.5 like the directions say. So if you followed the paper pattern with the corner pieces and the cutting, you really messed up as well. My other mistake was that I used one piece of fabric instead of making the six blocks and didn't adjust to make it right. The pattern was just really confusing direction wise with the layout. I got lost on the dimensions of the quilt because of the inconsistencies of it. I should have just kept to the paper template and gone from there with the measurements.

Here's what I have done:
From Blogger Pictures


It's still stunning though. I just need to finish up a few details and then will quilt it. I loved the border fabric and picked the colors from it.

It's a great pattern. The flower part was KISS simple but the confusion between the paper template and the directions really messed me up.

I loved doing the triple stitch on my Sapphire. What a beautiful job and it was so easy. The 1/4 seam allowance is perfect and even though the quilt isn't flat, the borders match up. I love this machine.

I also didn't like the fusible webbing my LQS had. It was a giant pain to work with. I'm not sure what brand it is, but I won't buy it again.